
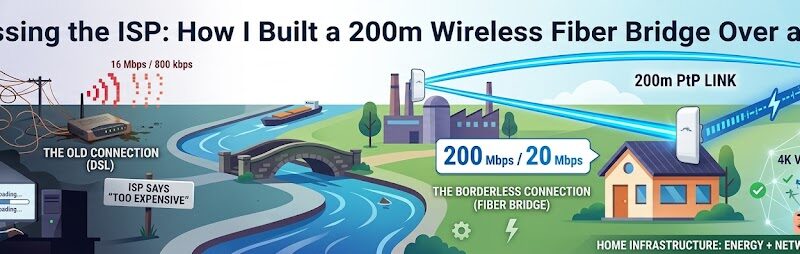
After three years of enduring legacy DSL speeds, I finally hit my breaking point. I couldn’t take the daily pain of a measly 800 kbps upload and a restrictive 16 Mbps download ceiling anymore.
When I approached the fiber providers, the answer was a flat refusal: “We will not install fiber to your location due to the infrastructure cost.”
Faced with permanent digital isolation, I decided to take matters into my own hands. If the ISPs wouldn’t bring the fiber to me, I would go out and capture it myself.
The Blueprint: Shooting Data Over a Canal
My plan hinged on a workaround: finding a location that could get high-speed fiber, and then beaming it directly to my property. Luckily, a friend living 200 meters away had access to a full FTTP connection. The only problem? Between our properties sat a canal and two massive, industrial-sized buildings blocking a straightforward path.
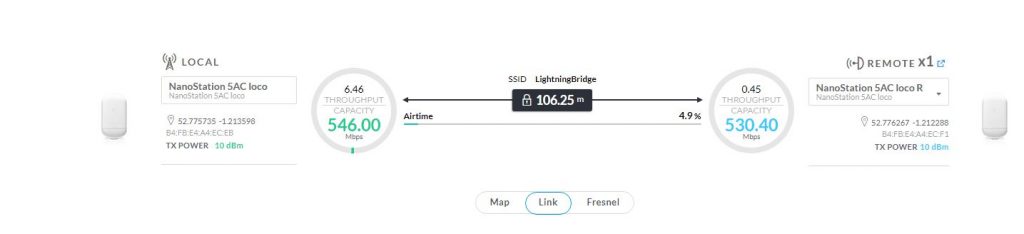
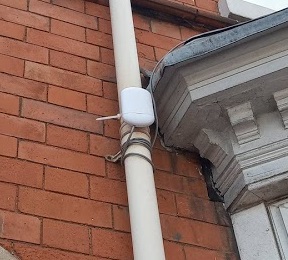
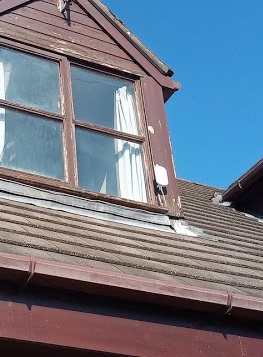
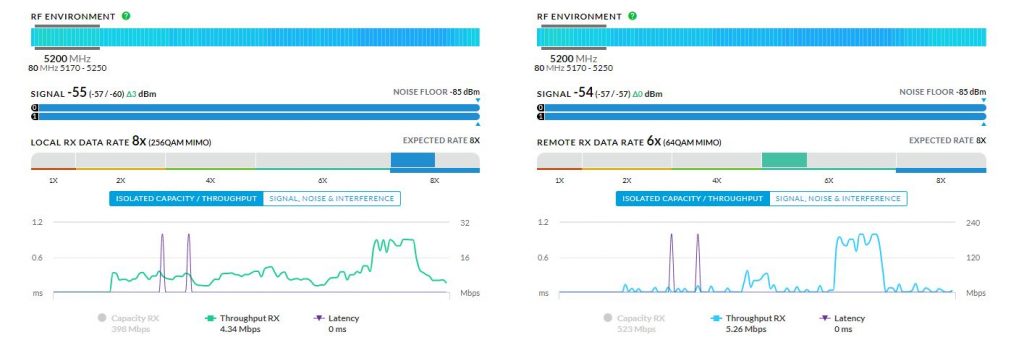
After conducting some RF environment testing, I mapped out a viable Line of Sight (LoS) and selected my hardware. I deployed a pair of Ubiquiti NanoStation 5AC Loco units to build a dedicated 5GHz Point-to-Point (PtP) wireless bridge across the 200m gap.
Once the wireless link was established, I had a 300 Mbps fiber line provisioned at the host site. Using the NanoStations to handle the final 200m leg back to my house, I successfully bypassed the copper lines completely.
The Result: I instantly jumped from a sluggish 16 Mbps DSL line to a roaring 200 Mbps download and 20 Mbps upload speed at my terminal.
The Hardware Stack
To keep the installation clean, reliable, and highly resilient against power drops, I selected a compact, enterprise-grade hardware stack:
Power Resilience: The entire network core, including the router and the wireless bridge, is backed up by a dedicated DC UPS battery system to guarantee zero downtime during localized power flickers.
Wireless Link: 2x Ubiquiti NanoStation 5AC Loco operating a high-throughput 5GHz PtP link across the air.
Routing & Switching: A Ubiquiti EdgeRouter X. By leveraging PoE (Power over Ethernet) passthrough, the router powers the local NanoStation directly, keeping external cabling to an absolute minimum.
Local Access Point: A Ubiquiti UniFi AC Lite handles the internal wireless distribution within the property.

It has now been 6 months since this custom wireless backhaul became my primary internet connection, and the performance has been absolutely flawless.
Whether pushing the connection to its limits with heavy 4K video uploads, streaming high-bitrate media, or dealing with the strict latency requirements of VR gaming, I have yet to experience a single drop, lag spike, or delay.
Even more impressive is how the airOS link handles the unpredictable British climate. As you can see from the dashboard metrics, the signal remains locked in at an incredibly stable $-54\text{ dBm}$. This setup has quietly hummed along through dense snow, torrential downpours, and severe storms packing 50mph gales.
When the traditional telecom infrastructure failed to deliver, a little bit of homelab ingenuity and two 50p-sized ideas proved that you can build your own gigabit-ready future.